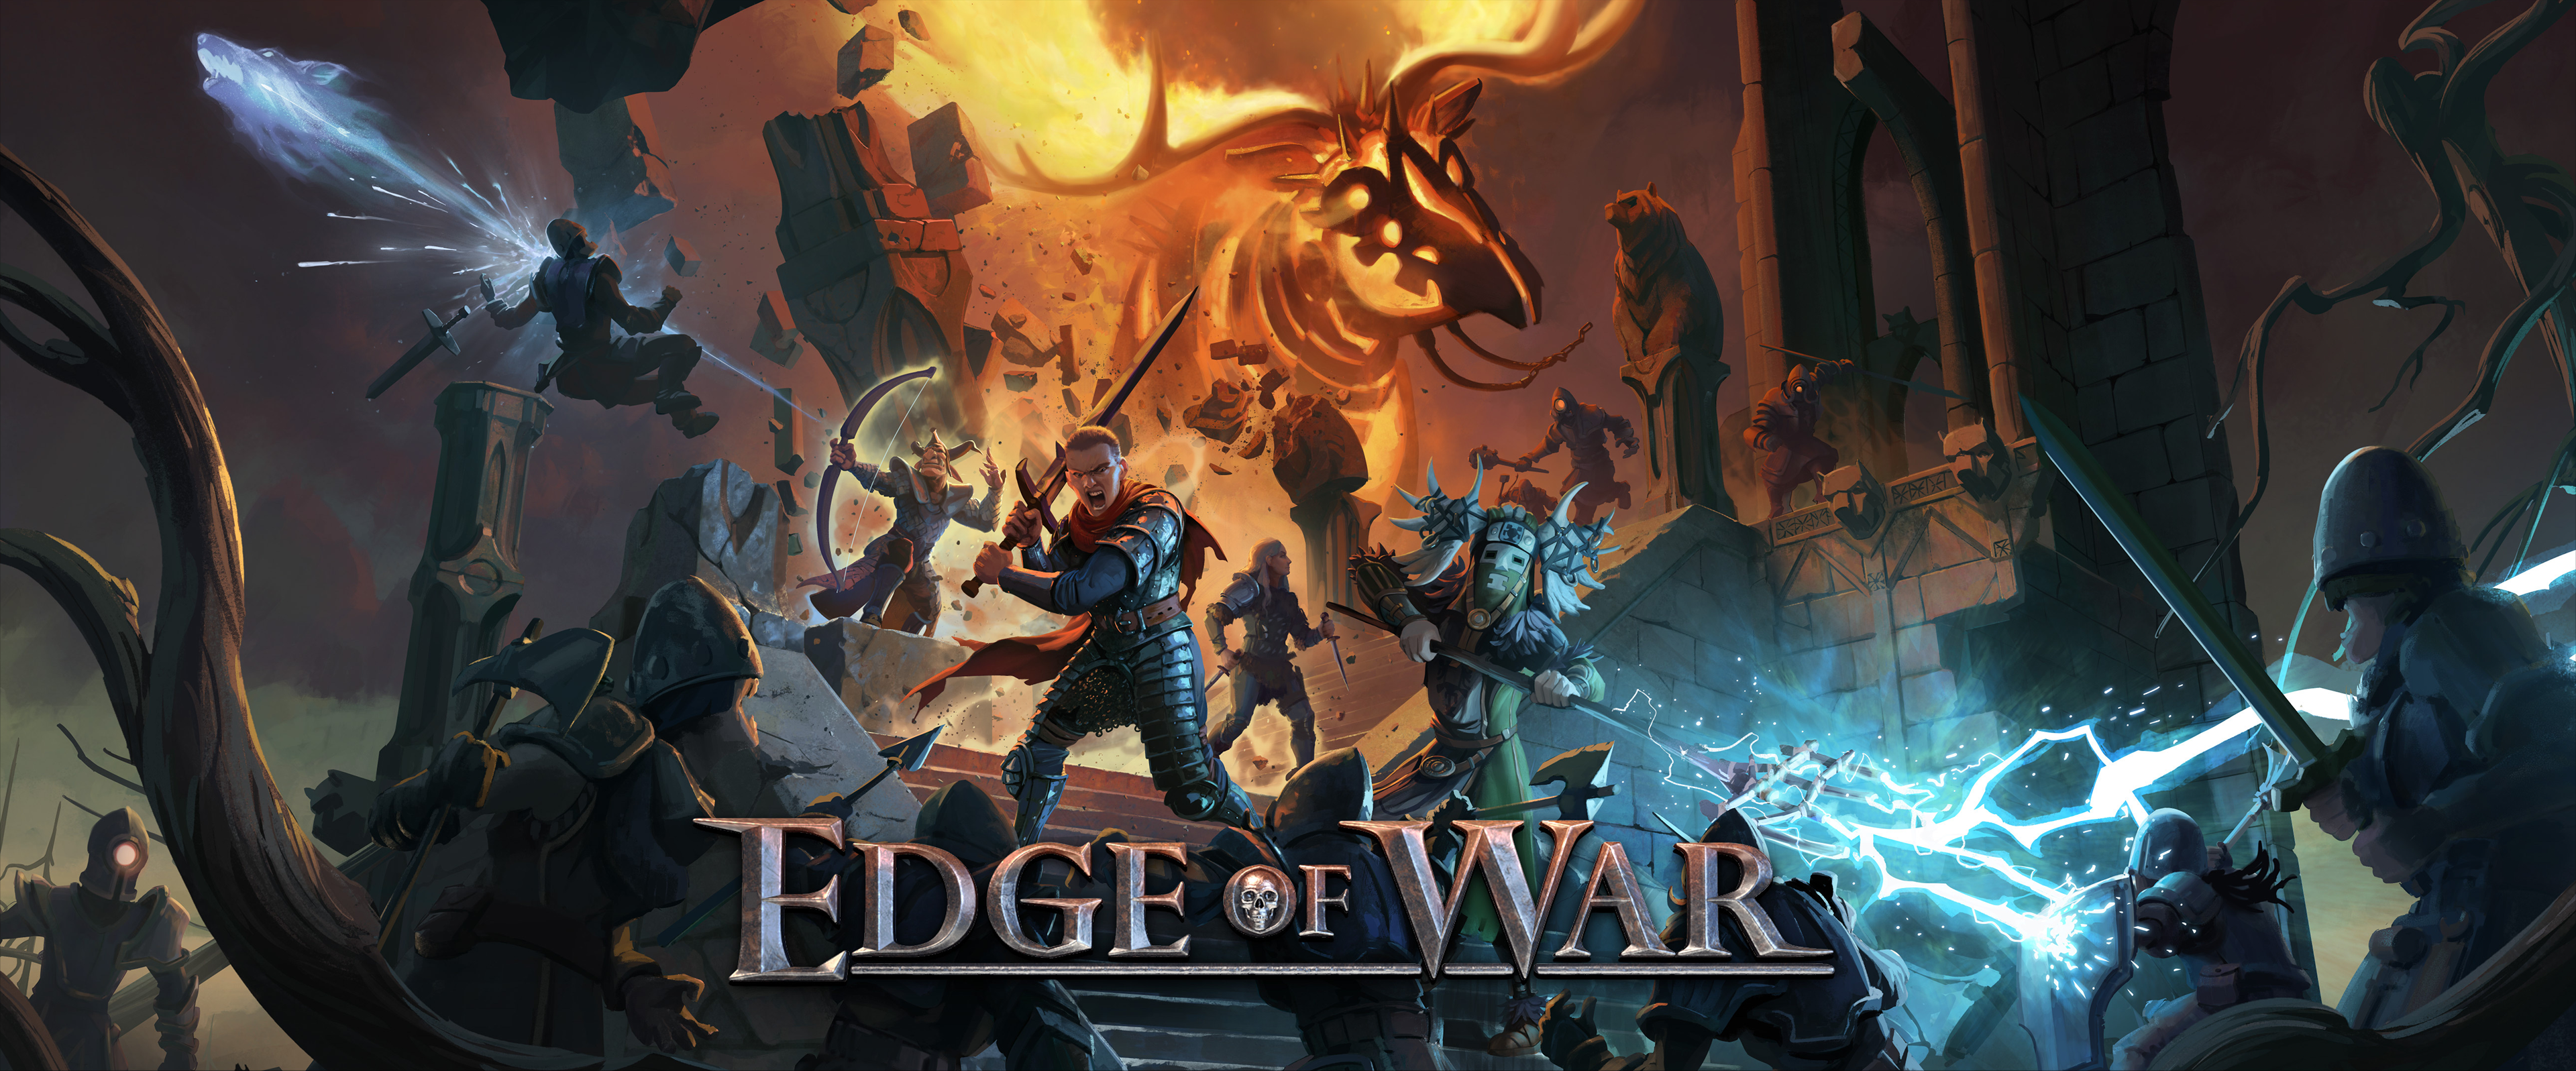

Action Squad Studios Role: Junior Game Programmer
Duration: June 2022 - August 2023
Released as Early Access on Steam
Responsibilities:
Gameplay Programming
UI programming
Tools programming
One of my core responsibilities on edge of war was to develop the overworld map system where I had free reins on how to structure it with a vague design what needed to be included. I also developed editor tools to be used by designers to draw and add locations on the map.
I had a key role in implementing the different skills in the game where I was involved in a large quantity of skills as well as the feat and ability systems in the game. Here I worked closely with designers to come up with interesting and doable solutions.
My tasks also involved miscellaneous UI work varying from fully implementing new canvases to modifying already existing UI features.
Party states
One important feature for the overworld navigation system was to allow the player to be able to stop and rest at any point. It was also important for encounters to be able to occur on the path connections.
This was achieved by saving the T value from the splines to the game session. this allowed an accurate position along the spline, allowed saving the game at any point along any path as well as ensured the player party returned to the same location after finishing an encounter.
This was achieved by saving the T value from the splines to the game session. this allowed an accurate position along the spline, allowed saving the game at any point along any path as well as ensured the player party returned to the same location after finishing an encounter.
The player party had NavigationStates defined as a finite state machine such as OnLocation, PartyResting, Stopped, TravelingConnection or TravelingPath
Onlocation - Enables ability to enter a defined location and navigation arrows
Onlocation - Enables ability to enter a defined location and navigation arrows
Party Resting - disable all navigation options and is set to stopped after resting.
Stopped - If the player has stopped on a connection
Traveling connection - the player is traveling a single connection
Traveling path - the player has a series of connection it is currently traveling
Pathfinding
The pathfinding in edge of war was made with an implementation of the common A* pathfinding algorithm. For consistency I'll refer to cells as nodes and edges as connections.
to calculate the cost of each node the simple calculation F = G + H is used
to calculate the cost of each node the simple calculation F = G + H is used
F: The total estimated cost to travel to the node
G: Cost of the entire path to the current node
H: An estimation cost to the goal node. In this case Euclidean distance was used. the travel speed of the connection was also added into the calculation as a weight to be considered as traveling on water is significantly faster than on land.
an open and closed list was then used where calculated nodes where placed in the closed list and available nodes from the last calculated node was placed in the open list to be evaluated.
Using the first node as a starting point the F value is calculated for each neighboring node. if a neighboring node is in the closed list skip it.
if the neighboring node is not in the open list calculate its F G H values, set the current node as its parent and add it to the open list for later evaluation.
if the neighboring node is already in the open list compare the new G value to determine if there already is an existing path that is shorter or if the current path is the better path.
Each node is evaluated until either the open list is empty or the goal node is found.
Once the goal node is found the connections in order can be retrieved through the linked list of parents assigned while evaluating F G H values in the earlier step
Connection and Splines
To create the connections I decided to go with splines. initially I tried using Bezier curves but after a discussion with colleagues we came to the conclusion catmull rom curves would be more intuitive as it allows the curve to go through a set of points instead of being weighted by the handle points giving a more natural workflow for placing paths.
To create the connections I decided to go with splines. initially I tried using Bezier curves but after a discussion with colleagues we came to the conclusion catmull rom curves would be more intuitive as it allows the curve to go through a set of points instead of being weighted by the handle points giving a more natural workflow for placing paths.
The code for calculating the position along the catmull rom spline looks like this:
public static Vector3 GetCatmullRomPosition(float t, Vector3 p0, Vector3 p1, Vector3 p2, Vector3 p3)
{
float t2 = t * t;
float t3 = t2 * t;
{
float t2 = t * t;
float t3 = t2 * t;
Vector3 a = 2f * p1;
Vector3 b = (p2 - p0) * t;
Vector3 c = (2f * p0 - 5f * p1 + 4f * p2 - p3) * t2;
Vector3 d = (-p0 + 3f * p1 - 3f * p2 + p3) * t3;
Vector3 pos = 0.5f * (a + b + c + d);
return pos;
}
}
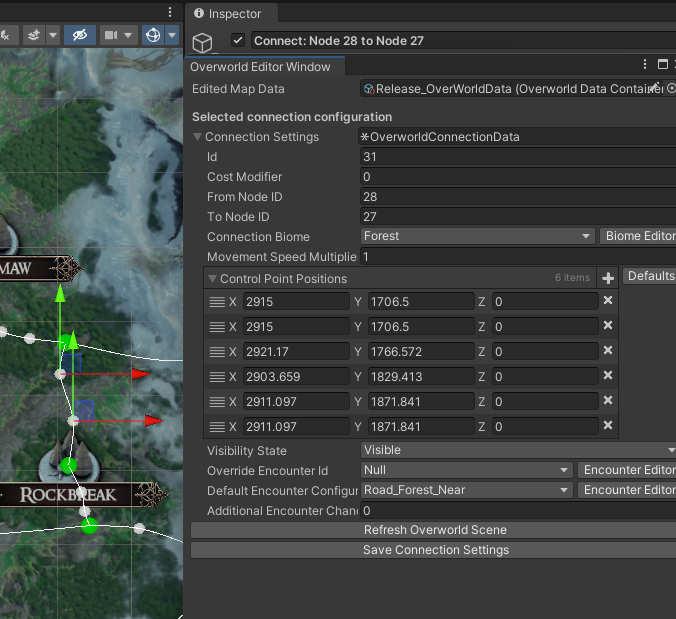
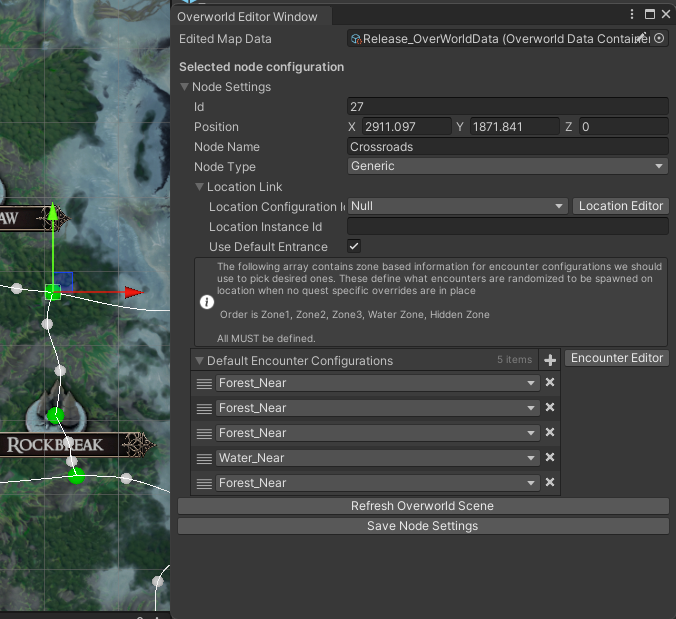
Editor
The editor made is made through unity's editor windows and GenericMenu system. Where I updated the options depending on the selected item in the hierarchy or if a control point was clicked to minimize changing edit modes.
The editor made is made through unity's editor windows and GenericMenu system. Where I updated the options depending on the selected item in the hierarchy or if a control point was clicked to minimize changing edit modes.
Apart from the scene editor options I added all the relevant data for a node/connection in the editor window as the editor had to be separated from the actual game data. The nodes themselves then had a node viewer retrieving data using an Id.
Example what clicking a connection looks like from the perspective of the editor:
Example what clicking a connection looks like from the perspective of the editor:
private static void OnClickConnection(GenericMenu menu, Vector3 clickedPos)
{
const float gizmoSize = 8f;
{
const float gizmoSize = 8f;
OverworldConnection activeConnection = Selection.activeGameObject.GetComponent<OverworldConnection>();
for (int i = 2; i < activeConnection.ControlPoints.Count - 2; i++)
{
if (Vector3.Distance(clickedPos, activeConnection.ControlPoints[i]) < gizmoSize)
{
menu.AddItem(new GUIContent($"Remove Control Point {i - 1}"), false, RemovePoint, i);
}
}
{
if (Vector3.Distance(clickedPos, activeConnection.ControlPoints[i]) < gizmoSize)
{
menu.AddItem(new GUIContent($"Remove Control Point {i - 1}"), false, RemovePoint, i);
}
}
menu.AddItem(new GUIContent("New Control Point"), false, CreateControlPoint);
menu.AddItem(new GUIContent("Remove Connection"), false, RemoveConnection);
menu.AddItem(new GUIContent("Remove Connection"), false, RemoveConnection);
menu.ShowAsContext();
Event.current.Use();
Event.current.Use();
void RemoveConnection()
{
_mapData.RemoveConnectionData(activeConnection.ID);
OverworldEditor.RemoveOverworldConnection(activeConnection.ID);
OverworldEditor.Utils.UpdatePaths();
}
void RemovePoint(object clickedIndex)
{
activeConnection.ControlPoints.RemoveAt((int)clickedIndex);
OverworldEditor.Utils.UpdatePaths();
}
{
activeConnection.ControlPoints.RemoveAt((int)clickedIndex);
OverworldEditor.Utils.UpdatePaths();
}
void CreateControlPoint()
{
Selection.activeTransform.GetComponent<OverworldConnection>().InsertControlPoint(clickedPos);
OverworldEditor.Utils.UpdatePaths();
}
}
{
Selection.activeTransform.GetComponent<OverworldConnection>().InsertControlPoint(clickedPos);
OverworldEditor.Utils.UpdatePaths();
}
}
Skills
I worked on a majority of the skills in the game for the player characters as well as some for NPCs. The skills where implemented using set ActionEventSequences using targeting configurations. To implement new skills I wrote new ActionEvents. This sequence was responsible for activating sound effects, performing damage, add status effects, set animation states, and much more.
When I joined the team there were a couple ActionEvents existing already but a few new features I had to write were:
When I joined the team there were a couple ActionEvents existing already but a few new features I had to write were:
Cone Targeting
We had a couple skills needing cone targeting so I had to evaluate which entities where in the cone area.
public override void GetEntities(Vector3 origin, Vector3 direction, List<ISelectionTarget> result, string activeCharacterId)
{
result.Clear();
{
result.Clear();
GetEntitiesInRange(origin, result, activeCharacterId);
var dir = direction;
dir.y = 0;
dir.Normalize();
dir.y = 0;
dir.Normalize();
var source = origin;
source.y = 0;
source.y = 0;
for (int i = 0; i < result.Count; i++)
{
var target = result[i];
var targetPos = target.Position;
{
var target = result[i];
var targetPos = target.Position;
var nearestPointInDetectionLine = origin + Vector3.Project(targetPos - origin, dir);
var selPos = result[i].GetSelectionPosition(nearestPointInDetectionLine);
selPos.y = 0;
selPos.y = 0;
var angle = Vector3.Angle(direction, (selPos - source).normalized);
if (angle > _angle / 2f)
{
result.RemoveAt(i--);
}
}
}
if (angle > _angle / 2f)
{
result.RemoveAt(i--);
}
}
}
Entity Line Targeting
For charge I needed to retrieve the nodes in the line we where charging to allow knocking any entities in the way of the charge and determine if there were friendly targets to return an invalid state for the skill. I used the Bresenham Line Algorithm to get each node in a straight line between the origin and the selected point on the grid.
The implementation looked like this:
The implementation looked like this:
public static void GetNodesInLine(GridNode startNode, GridNode endNode, List<GridNode> targetNodes)
{
Vector2Int checkPosition = new Vector2Int(startNode.XCoordinateInGrid, startNode.ZCoordinateInGrid);
Vector2Int endPosition = new Vector2Int(endNode.XCoordinateInGrid, endNode.ZCoordinateInGrid);
{
Vector2Int checkPosition = new Vector2Int(startNode.XCoordinateInGrid, startNode.ZCoordinateInGrid);
Vector2Int endPosition = new Vector2Int(endNode.XCoordinateInGrid, endNode.ZCoordinateInGrid);
int deltaX = Mathf.Abs(endPosition.x - checkPosition.x);
int deltaY = -Mathf.Abs(endPosition.y - checkPosition.y);
int signedX = (int)Mathf.Sign(endPosition.x - checkPosition.x);
int signedY = (int)Mathf.Sign(endPosition.y - checkPosition.y);
int error = deltaX + deltaY; // positive number = positive Y direction, negative number = negative Y direction
int deltaY = -Mathf.Abs(endPosition.y - checkPosition.y);
int signedX = (int)Mathf.Sign(endPosition.x - checkPosition.x);
int signedY = (int)Mathf.Sign(endPosition.y - checkPosition.y);
int error = deltaX + deltaY; // positive number = positive Y direction, negative number = negative Y direction
while (true)
{
targetNodes.Add(AstarPath.active.data.gridGraph.GetNode(checkPosition.x, checkPosition.y) as GridNode);
if (checkPosition.x == endNode.XCoordinateInGrid && checkPosition.y == endNode.ZCoordinateInGrid) // End node Reached
break;
{
targetNodes.Add(AstarPath.active.data.gridGraph.GetNode(checkPosition.x, checkPosition.y) as GridNode);
if (checkPosition.x == endNode.XCoordinateInGrid && checkPosition.y == endNode.ZCoordinateInGrid) // End node Reached
break;
int error2 = 2 * error; //multiply by 2 for increased precision
if (error2 >= deltaY) // Should move in X direction
{
if (checkPosition.x == endNode.position.x)
break;
{
if (checkPosition.x == endNode.position.x)
break;
error += deltaY; // Remove dy to get direction of next point on line
checkPosition.x += signedX; // move next position on X Axis towards endPoint
}
checkPosition.x += signedX; // move next position on X Axis towards endPoint
}
if (error2 <= deltaX) // Should move in Y direction
{
if (checkPosition.y == endNode.position.y)
break;
{
if (checkPosition.y == endNode.position.y)
break;
error += deltaX; // Remove dx to get direction of next point on line
checkPosition.y += signedY; // move next position on Y Axis towards endPoint
}
}
checkPosition.y += signedY; // move next position on Y Axis towards endPoint
}
}
}
}
}